If you use a computer, chances are that you use Windows. That operating system by Microsoft, that for the last few years many people love to hate, but afraid of switching because…well…most of us just want to have something that just works… And Windows, even with it’s inconveniences does work and work well… especially if you’re anything like me and use programs and games from the early 2000s (Mostly games, because… well… I’m a dinosaur). However, not all things about Windows is sunshine and rainbows, The latest update… Windows11, has it’s flaws… with the redone UI, the TERRIBLE settings app, and the most recent “feature”, Windows Recall… Which is basically Microsoft Saying “Well… We want to train our AI model, so we’re just gonna spy on how you use your PC and use that data to make copilot even more annoying…”. What!!! Other than nuking Windows for a more privacy respecting operating system (cough… Linux), Most people just want Windows without the privacy nightmare, and also solve some of the inconveniences that there is in the way Windows work… Thankfully, there is a solution…
Video Link: Windows Utility in 2025
The WinUtil by CTT#
I’ve been a big fan of the youtube channel “Chris Titus Tech”. The guy mainly focuses on advanced tech stuff, Linux and privacy and security related stuff, and this is where I found out a way to “debloat” Windows, to make your Windows run faster. This was almost 4-5 years ago and I’ve been following his chronicles of making this utility since it’s inception… And been using this extensively for a while. Here is what the tool does from the lion’s mouth himself:
“This utility is a compilation of Windows tasks I perform on each Windows system I use. It is meant to streamline installs, debloat with tweaks, troubleshoot with config, and fix Windows updates. I am extremely picky about any contributions to keep this project clean and efficient.”
So let’s break down the features one-by-one.
How to Run the Thing?#
Well, If you’re not that tech savvy, it is going to be a bit of work, but trust me, it isn’t that bad… If you’re used to clicking Next…Next…Next while installing a program on Windows, then you can easily do this one as well.
First thing you need to do is to open Powershell/Terminal(Depending on if you run Windows 10 or 11). For that right click the start menu icon(on the botton left on Windows 10 or the windows icon on Windows 11, on the bottom center or bottom left corner) and select Powershell/Terminal(Admin), be sure to select the one with Admin written in parenthesis.
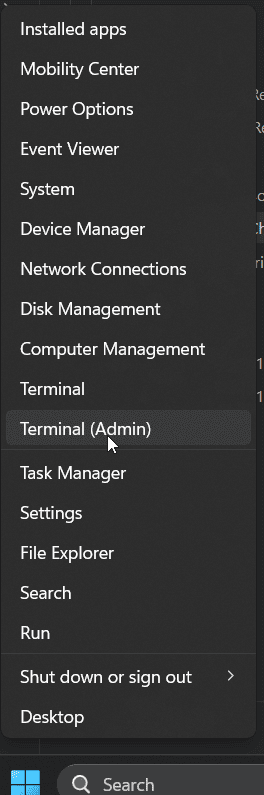
Once you open, click on yes on the window asking for administrator privileges, and enter the password(if asked). PSA: Do NOT use this tool on your work issued computer. once you’re in the terminal. paste the below command.
irm "https://christitus.com/win" | iex
once you hit enter… this screen will pop up and you’ll be greeted with the Windows utility: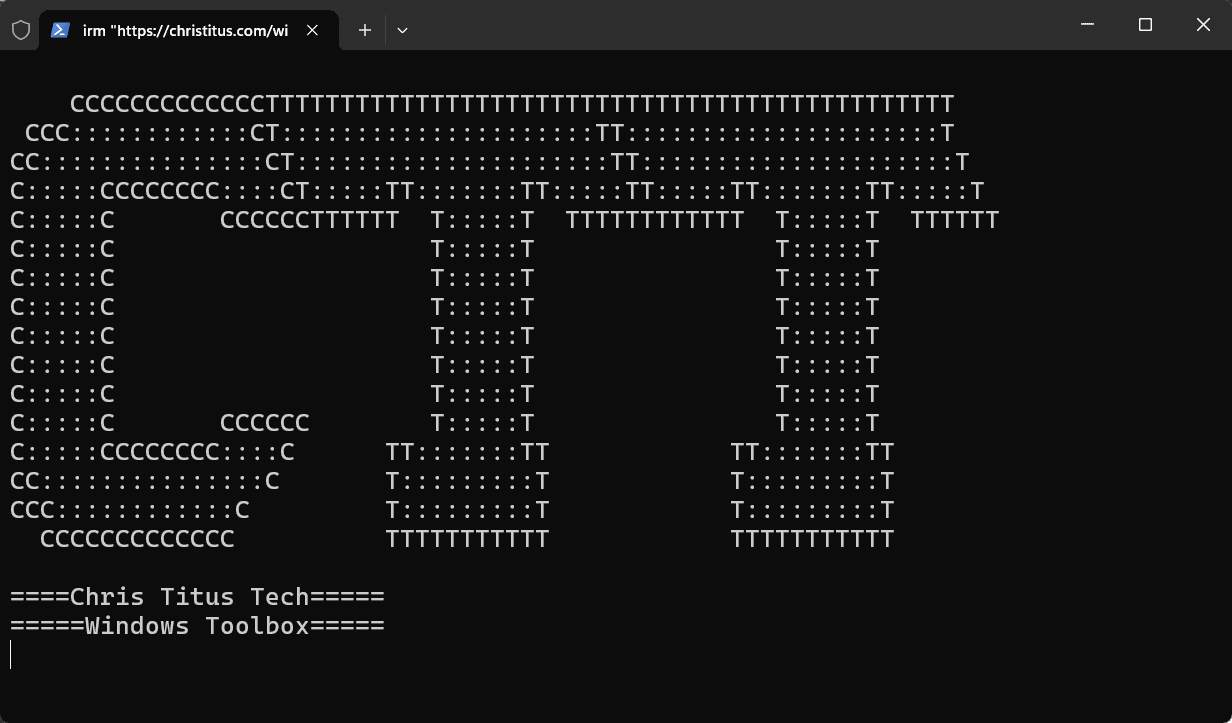
Note: Future updates might change the UI a bit here and there, but the overall functionality will still remain the same
Now that we have the tool up and running, let’s go through some of the features…
App Installation: Just a Click Away#
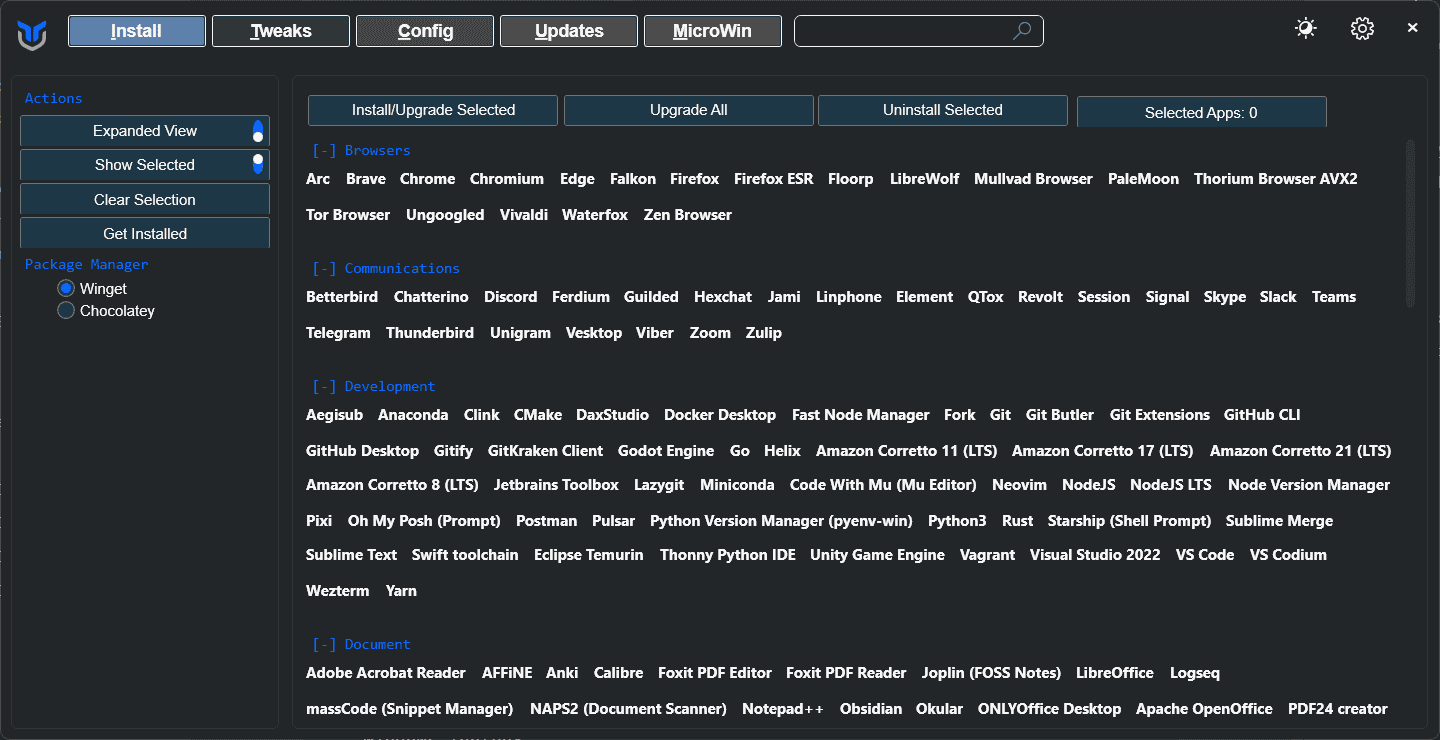
When you first open this script, you’re greeted with a screen that looks like this…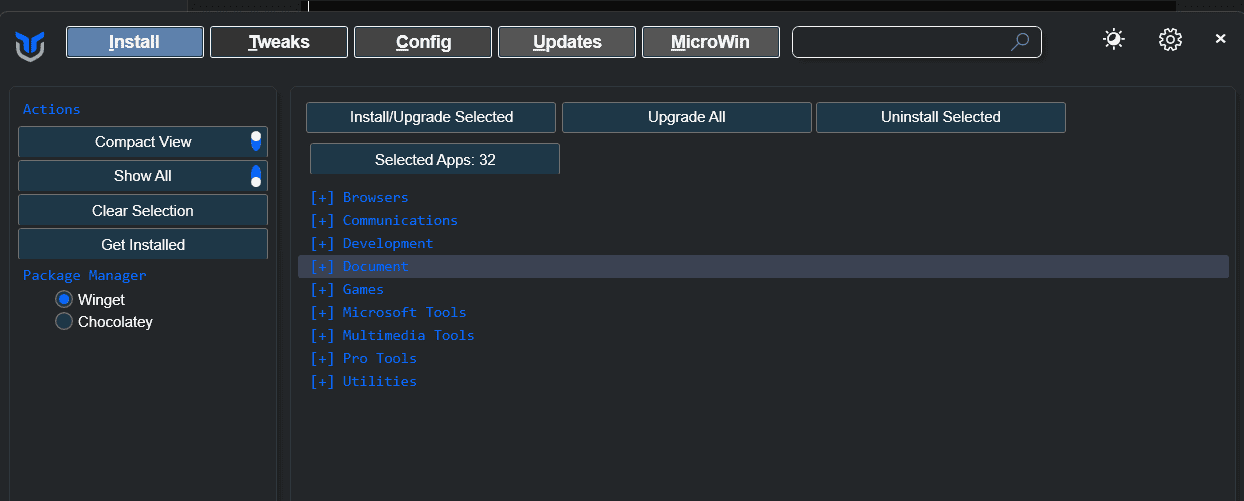
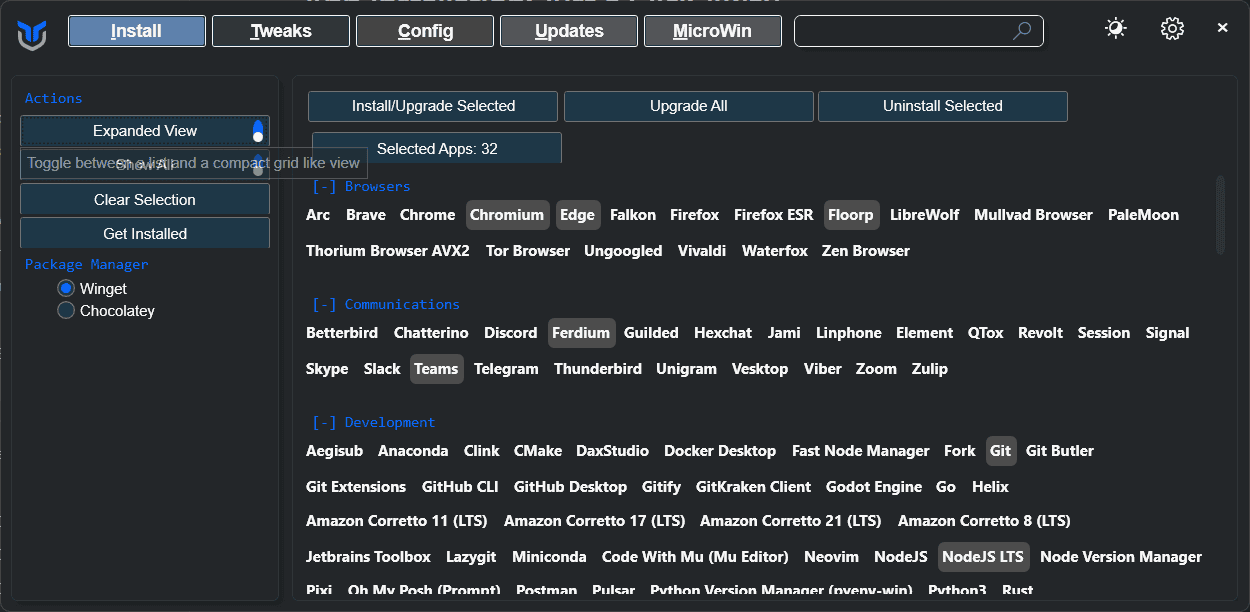
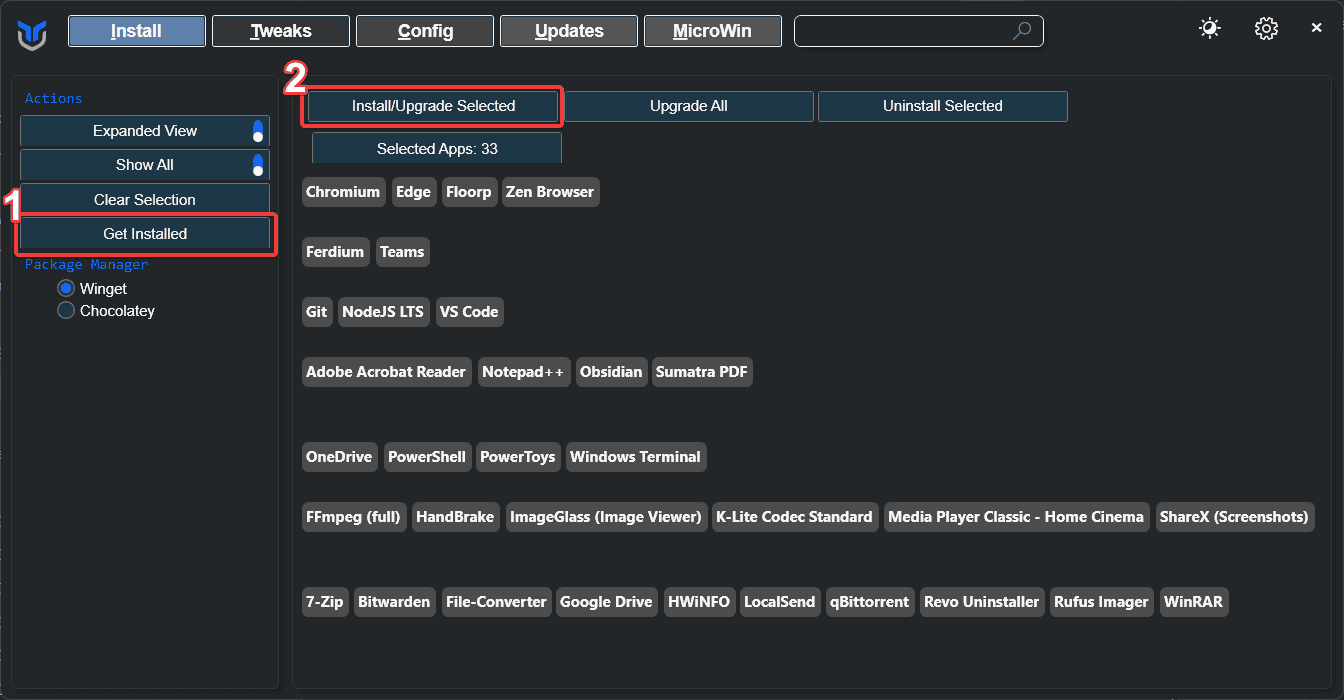
From here, select the apps that you need, and just hit “Install/Upgrade Selected” in the top. And just wait… No need to download the program from the website, no need to sit through pushing Next… Next… Next. just one click, and that’s it.
if you look at the terminal that you opened, you’ll be able to see what is happening in the background:
Tweaks: Making Windows Take on a Crash Diet#
This section deals with debloating, and tweaking Windows to make it sun smoother and also more private, you may not know it, but Windows does take a whole lot of telemetry about how you use your system, what programs you use and so much more… That also tanks your system performance if you run a relatively low end system or a laptop, or both… like me… This can make Windows more usable, by eliminating the unnecessary background processes, and also make it more privacy respecting..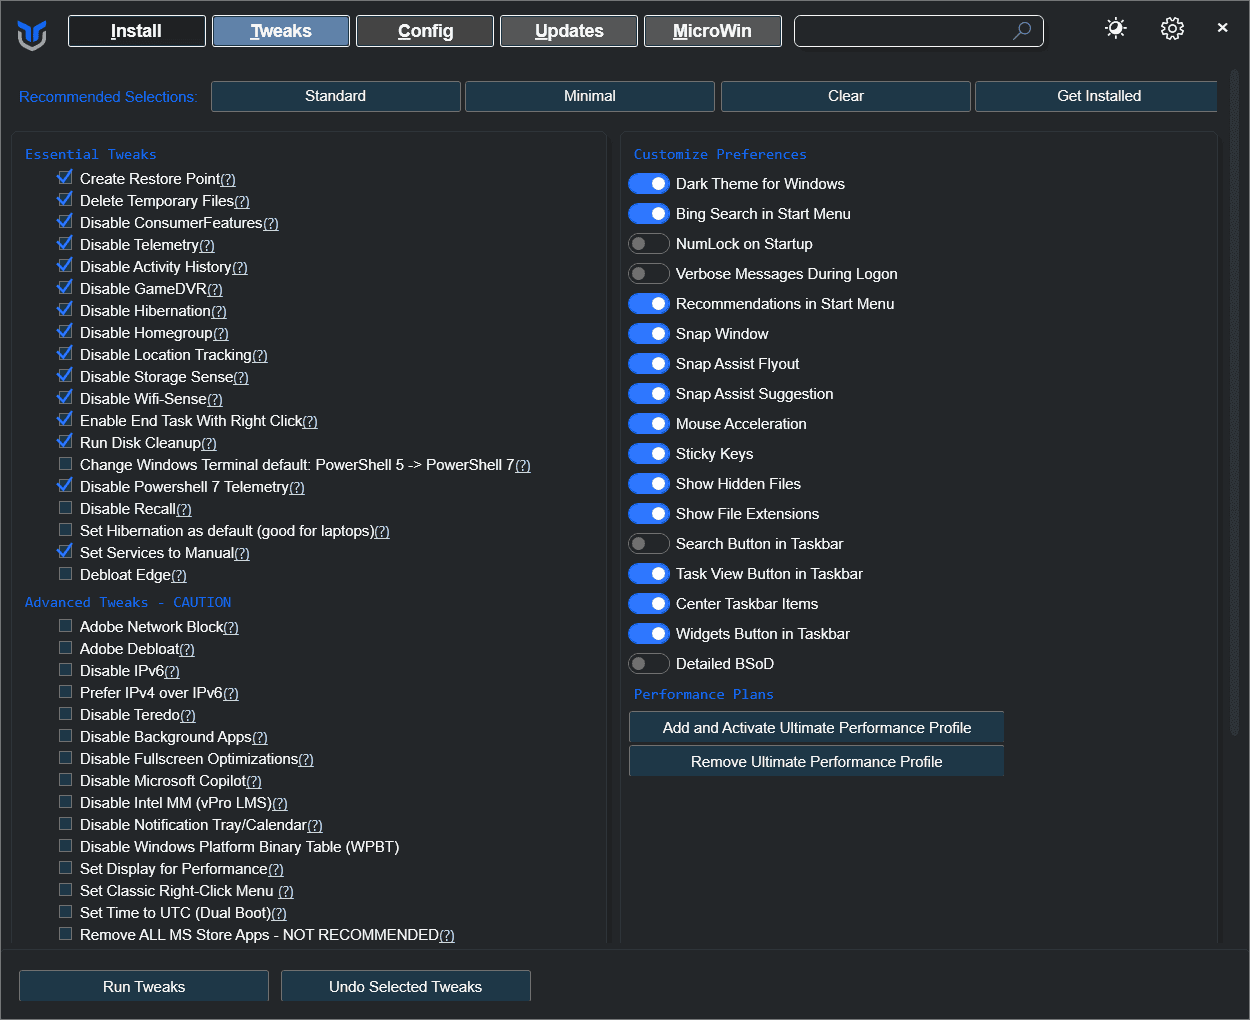
For the average joe, I’d recommend the standard tweaks, as this makes sure to take away all the fluff while maintaining the usability of Windows… if you know what you’re doing, by all means try out the other tweaks present… I’ve personally used the Standard tweaks along with a couple more options like:
- Disable Recall
- Set Hibernation as default(since my main system is a laptop)
- Change Windows terminal default
- Debloat edge
- Set classic right click menu(I HATE the new Windows 11 right click menu)
- Set the DNS to cloudflare
But I still remain, the standard tweaks are good enough for most, and if you do run into any issues, you can always undo the tweaks, by selecting them and hitting “Undo Selected Tweaks”.
Tweaks: For the Advanced Folks Out There#
I’m not going to delve a lot into this screen, as these are the tweaks that only like 20% of Windows users care about… But since I am one of those 20% I’ll talk about it…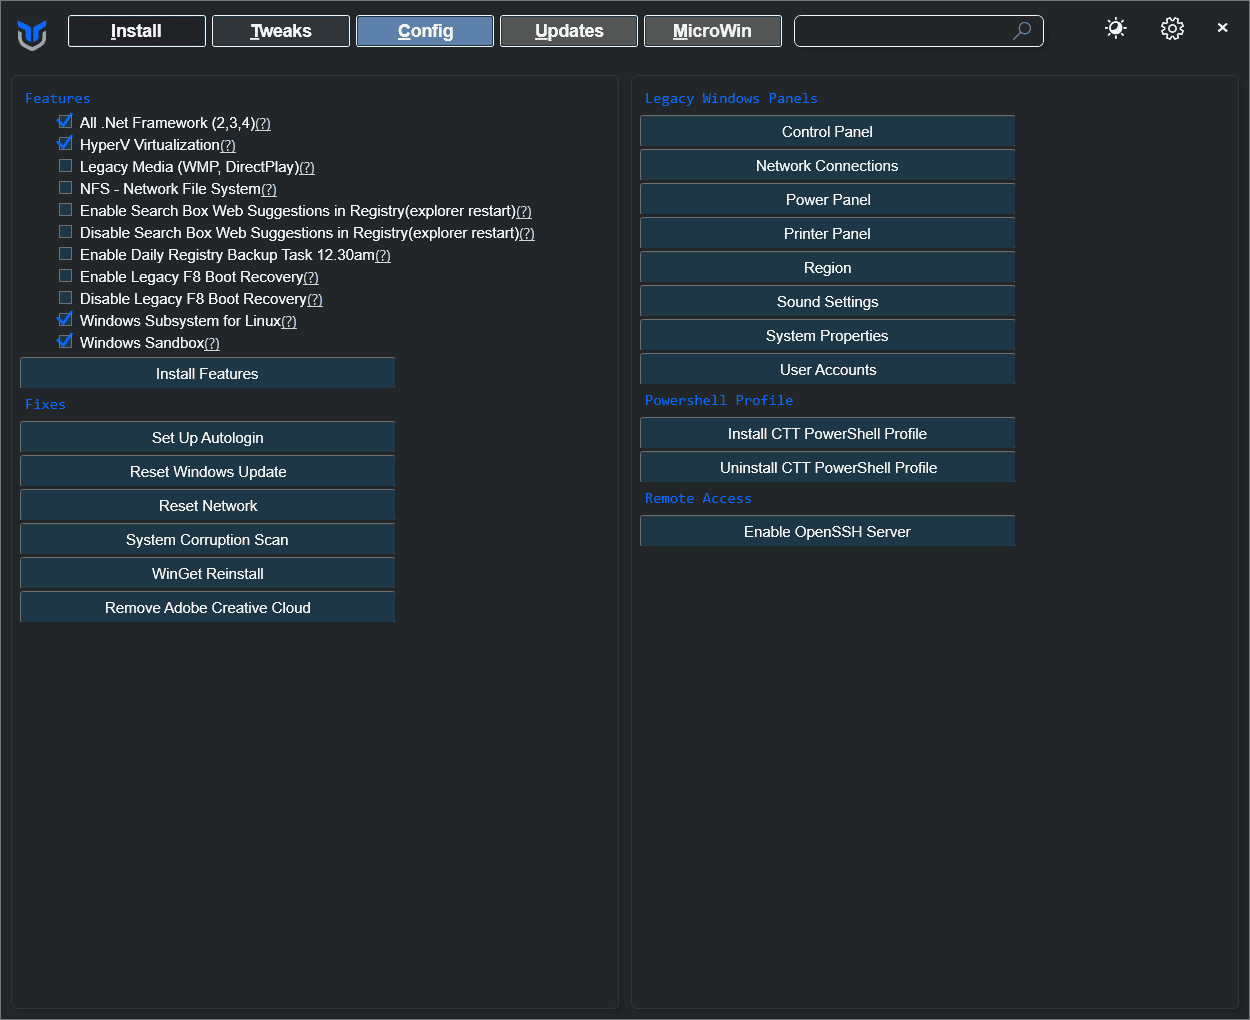
Also, another feature of note, is to bring up the old school control panel options that Windows completely nuked in Windows 11(by nuking, I mean completely hid it from the user). This lets you take control of your settings in a more familiar and granular way instead of using the god-awful settings app (I can see the sysdamins scrreeching with joy…).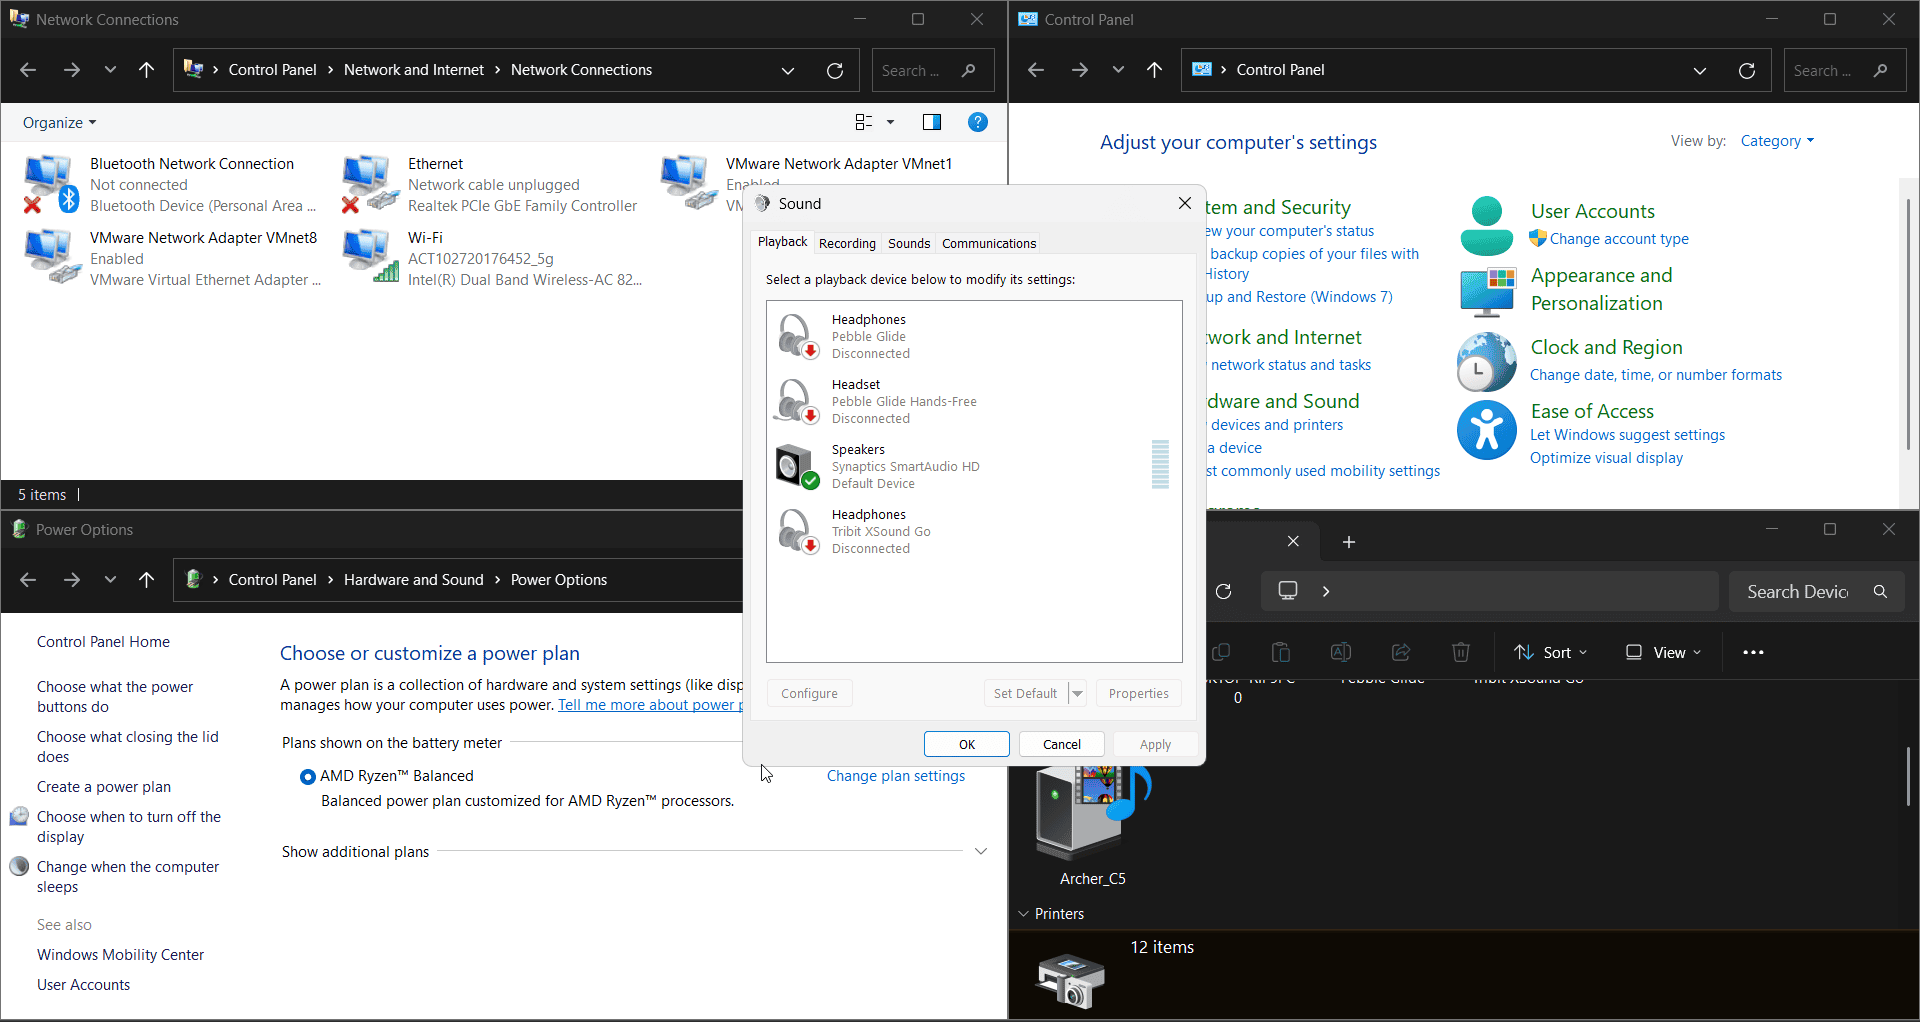
Updates: Prevent Windows from Forcing Stuff Down Your Throat#
Windows Update…. The fewer I say about it the better… I mean the proof that microsoft is tracking us can be seen here… When we’re doing something extremely critical… Here comes Windows saying “Wait for an hour.. I’ve got some updating to do”….🤬. Thankfully, there is a solution. Enter the updates tab: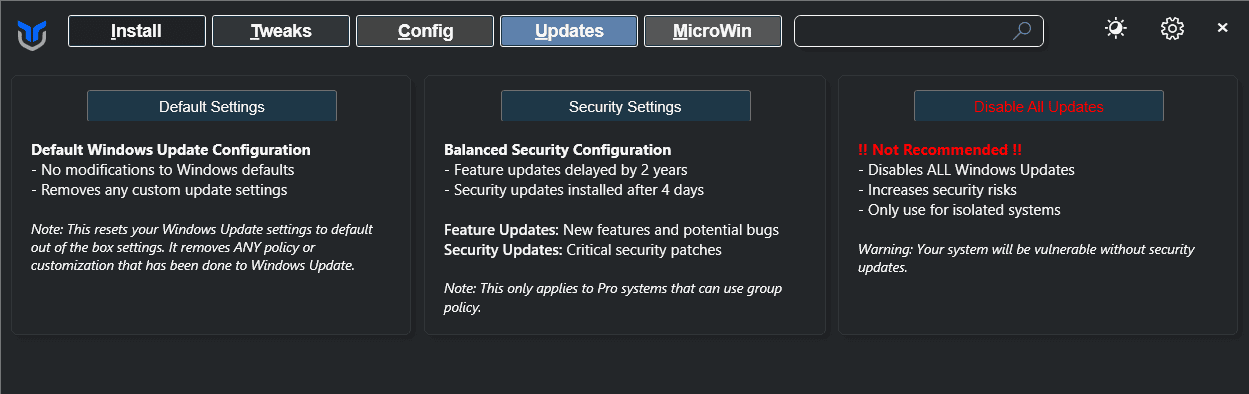
Here you can choose what updates come to you. I’s personally recommend the Security Settings, as it blocks any new features that nobody will use from coming, but keeps your security patches up-to-date. Which is less annoying than your regular updates. For the adventurous out there, you can disable updates entirely, but do so at your own risk. Not getting patched for the gazillion vulnerabilities that pop up every now and then is not an ideal place to be in. I personally use the Security Settings option and it works like a charm, and makes Windows less annoying and lets you actually complete your work on time.
MicroWin: Get Windows Debloated Right from the Start#
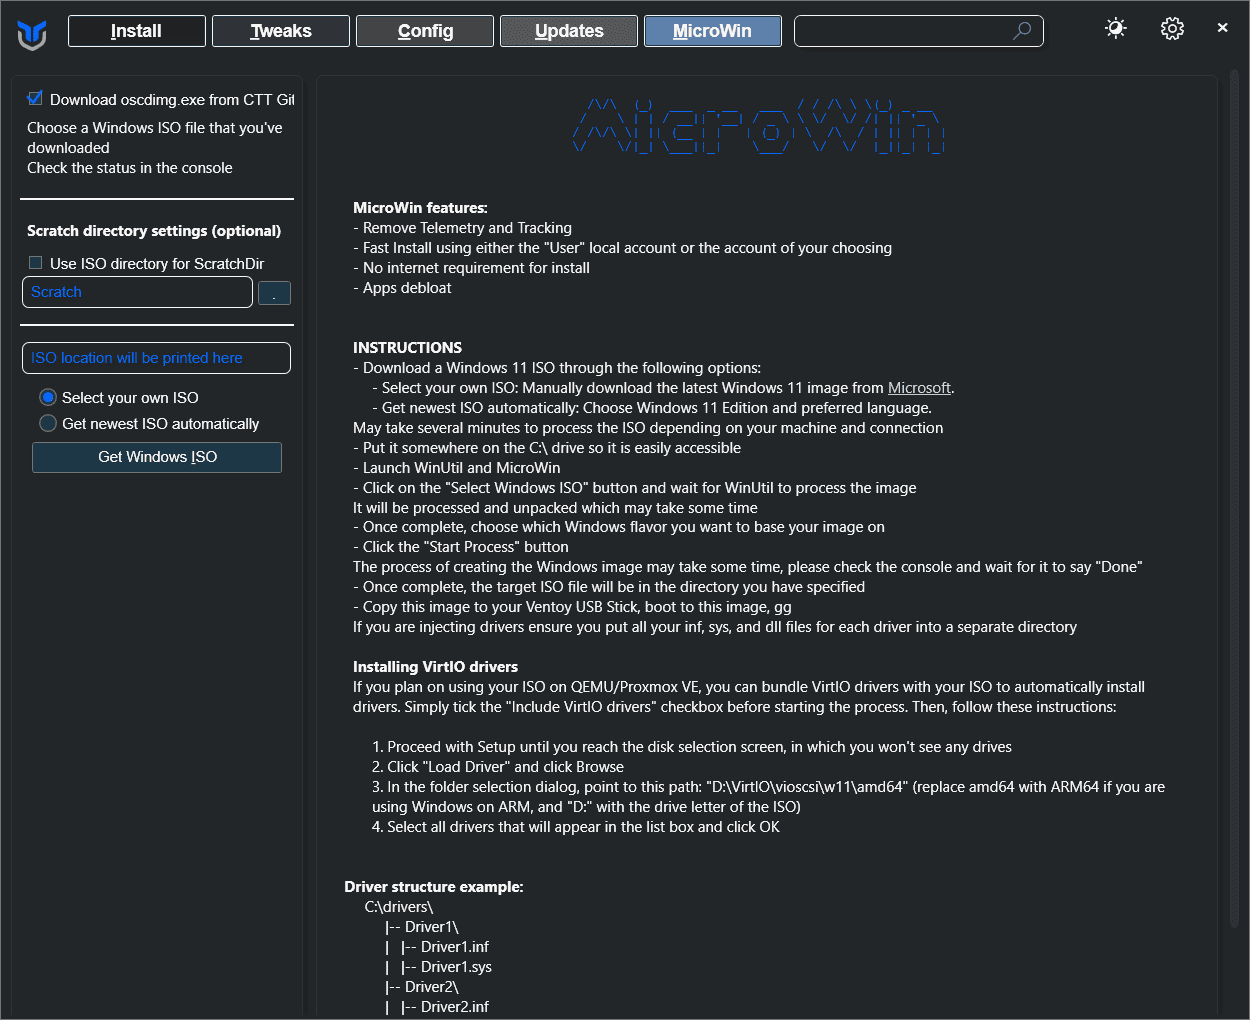
Introduced not that long ago, MicroWin allows you to make a debloated version of Windows, for installing on a fresh system. For anyone familiar with Windows AME, or the other custom debloated ISOs, this is kind of that but not going too extreme. MicroWin tries to achieve a balance between usability, security and lightweight performance. You can download the latest Windows iso, and make it yourself, or let the tool do all the work for you, by downloading the latest Windows iso, and make the debloated version for you. Now you can enjoy a lightweight, privacy respecting version of Windows. And you don’t need a Microsoft account to use it… How cool is that?!
Conclusion: Reclaim Your Windows Experience#
Windows, for all its quirks and privacy concerns, remains a reliable workhorse for many. The WinUtil by Chris Titus Tech offers a powerful way to tailor your Windows experience, striking a balance between functionality, privacy, and performance. Whether you’re a tech novice looking for a smoother experience or a seasoned user wanting granular control, this utility provides a valuable toolkit.
From simplifying app installations to minimizing telemetry and managing updates, WinUtil allows you to take charge of your operating system and reduce the annoyances that often plague Windows. And with MicroWin, you can even start with a debloated base, ensuring a clean and efficient system from the get-go.
While alternatives like Linux exist, switching can be a daunting task. WinUtil provides a practical alternative, allowing you to stay within the familiar Windows ecosystem while significantly enhancing its privacy and performance. So, if you’re looking to make Windows “just work” better, give the WinUtil a try. You might be surprised at the level of control you can achieve. Remember to proceed with caution, understand the implications of each tweak, and most importantly, do not use this tool on your work-issued computer. Now go forth and reclaim your Windows experience!